As an Amazon Associate, I earn from qualifying purchases
Fixing a cracked windshield may seem daunting. It’s easier than you think.
A cracked windshield can be a real headache. It obstructs your view and can worsen if not addressed. Whether it’s a small chip or a long crack, knowing how to fix it can save you time and money. This guide will walk you through the steps to repair a cracked windshield, ensuring you can handle minor damages before they become major problems.
Stay safe and keep your vehicle in top shape by learning these simple, effective methods.

Credit: www.youtube.com
Essential Tools And Materials
Fixing a cracked windshield requires the right tools and materials. Having the proper items ensures a smooth repair process and better results. Here’s a guide to the essential tools and materials you need.
What You Need
- Windshield repair kit – This kit typically includes a resin, curing strips, and an applicator.
- Razor blade – Useful for removing excess resin from the windshield.
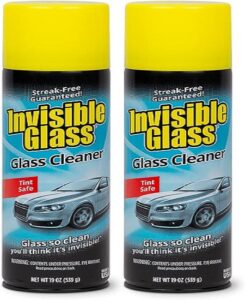
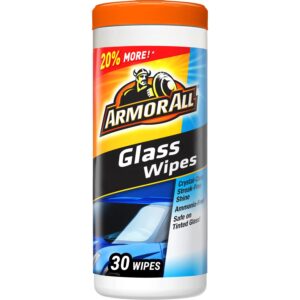
- Glass cleaner – Ensures the area is clean before starting the repair.
- Microfiber cloth – Helps in cleaning and drying the windshield without leaving streaks.
- Masking tape – Protects the surrounding areas while you work.
- UV light – Speeds up the curing process of the resin.
Where To Buy
You can purchase these tools and materials from several places:
| Store | Items Available |
|---|---|
| Auto Parts Stores | Windshield repair kits, razor blades, and glass cleaner |
| Online Retailers | All listed tools and materials |
| Supermarkets | Microfiber cloths, masking tape |
| Hardware Stores | Razor blades, masking tape, and glass cleaner |
Having these tools and materials ready will help you fix your windshield quickly. Make sure to purchase high-quality items for the best results.
Safety Precautions
Fixing a cracked windshield can be a daunting task. Safety should be your priority. Follow these precautions to ensure a safe repair process.
Protective Gear
Always wear protective gloves. Glass shards can cause serious injuries. Protect your eyes with safety goggles. This shields against flying debris. Long-sleeved clothing is also advisable. It covers your skin from potential cuts.
Working Environment
Choose a well-ventilated area. Proper airflow helps clear out fumes. Work in a well-lit space. Good lighting ensures you see the crack. Avoid working in extreme temperatures. Too hot or too cold can affect the materials.
Assessing The Damage
Before fixing a cracked windshield, it’s important to assess the damage. Understanding the extent and type of crack will help decide the best repair method. This step ensures safety and prevents further issues.
Types Of Cracks
Windshield cracks come in various types. Knowing these types helps in assessing the damage.
First, there are chip cracks. These are small and often caused by debris. They look like a small dot or a star.
Next, there are edge cracks. These start at the edge of the windshield. They can quickly spread and weaken the entire glass.
Then, there are stress cracks. These occur without an impact. Temperature changes or pressure can cause them.
Lastly, there are bullseye cracks. These are circular and often result from a direct hit. They resemble a target with a central point and surrounding rings.
Severity Assessment
Assessing the severity of the crack is crucial. Minor cracks can be fixed easily. Larger or deeper cracks might need professional help.
First, measure the crack. Cracks shorter than six inches are usually repairable. Longer cracks might need a complete windshield replacement.
Next, check the depth. Surface-level cracks are easier to fix. Cracks that penetrate deeper into the glass are more severe.
Finally, consider the location. Cracks in the driver’s line of sight are dangerous. They need immediate attention. Cracks near the edge are also risky. They can spread quickly and weaken the windshield.
By assessing the damage properly, you can choose the best repair method. Ensuring safety and extending the life of your windshield.

Credit: goodcar.com
Cleaning The Windshield
A clean windshield is crucial for a successful repair. Dirt and debris can hinder the process. Proper cleaning ensures the repair materials adhere well. Follow these steps to clean your windshield effectively.
Removing Debris
Begin by removing visible debris. Use a soft brush to gently sweep away dirt and loose particles. Avoid using a hard brush to prevent scratches. Pay attention to the edges where dirt tends to accumulate.
Proper Cleaning Solutions
Choose the right cleaning solution. Glass cleaner or a mixture of water and mild soap works best. Avoid harsh chemicals that can damage the glass. Spray the solution on the windshield generously.
Use a microfiber cloth to wipe the surface. Start from the center and move outwards. This prevents streaks and ensures a thorough cleaning. Repeat the process if needed. Make sure the windshield is completely dry before proceeding with the repair.
Applying The Repair Kit
Dealing with a cracked windshield can be frustrating. Applying a repair kit can save you time and money. This section will guide you through the process.
Preparation Steps
First, clean the damaged area. Use a glass cleaner and a dry cloth. Remove any dirt or debris. Next, make sure the glass is dry. The repair will not work if the glass is wet. Choose a warm day to repair. Cold weather can affect the resin.
Read the instructions on your repair kit. Each kit may have different steps. Gather all the tools you need. Most kits include resin, a syringe, and a curing strip.
Using Resin
Start by placing the adhesive mount over the crack. Make sure it seals tightly. Attach the syringe to the mount. Pull the syringe to create a vacuum. This helps remove air from the crack.
Next, push the syringe to fill the crack with resin. Do this slowly. You want the resin to fill all parts of the crack. Once the crack is filled, remove the syringe.
Place the curing strip over the resin. Move your car into the sunlight. UV light from the sun will harden the resin. Leave it there for at least 15 minutes. Once the resin is hard, remove the curing strip.
Scrape off any excess resin with a razor blade. Be careful not to scratch the glass. Your windshield should now be much stronger.
Curing The Resin
Once you have applied the resin to your cracked windshield, curing it is the next crucial step. Proper curing ensures the resin hardens effectively, restoring the strength and clarity of the glass. There are two main curing methods: using UV light and natural curing.
UV Light Curing
UV light curing is a fast and efficient method. Most windshield repair kits come with a small UV light. This light speeds up the curing process. Here’s how to do it:
- Apply the resin to the crack.
- Place the UV light over the resin.
- Leave the UV light on for 5 to 10 minutes.
- Check if the resin has hardened. If not, leave it for another few minutes.
UV light curing is quick and ensures the resin sets properly. This method works best on sunny days or with a UV lamp.
Natural Curing Methods
Natural curing methods rely on sunlight. They are effective but take longer than UV light curing. Follow these steps:
- Apply the resin to the crack.
- Park your car in direct sunlight.
- Leave the car for 30 to 60 minutes.
- Check the resin. If it’s still tacky, leave it for more time.
Natural curing is ideal for those without UV light. Ensure the weather is clear for best results.
| Method | Time | Tools Needed |
|---|---|---|
| UV Light Curing | 5-10 minutes | UV Light |
| Natural Curing | 30-60 minutes | Sunlight |
Both methods are effective. Choose the one that suits your tools and time. Properly cured resin ensures a strong and clear windshield.
Final Touches
After repairing your cracked windshield, it’s important to complete the final touches. These steps ensure the repair lasts and the windshield looks great. Paying attention to details can make a big difference.
Polishing The Windshield
Polishing the windshield helps remove any residue from the repair process. Use a clean, soft cloth and a good glass cleaner. Gently rub the surface in circular motions. This will restore clarity and shine.
Focus on the repaired area first. Ensure it blends well with the rest of the windshield. Then, polish the entire windshield for a uniform look.
Inspecting The Repair
After polishing, inspect the repair closely. Look for any remaining cracks or bubbles. These can weaken the windshield over time.
If you see any issues, consider seeking professional help. A thorough inspection ensures the windshield is safe for driving. Safety should always come first.
Preventing Future Cracks
Preventing future cracks in your windshield is essential. It saves you money and ensures your safety. Simple steps can reduce the risk of cracks. Let’s explore some practical tips.
Avoiding Common Causes
Park your car in a garage or under the shade. This protects the windshield from direct sunlight. Extreme heat can weaken the glass. Avoid slamming your car doors. Gentle closing reduces pressure on the windshield. Maintain a safe distance from large trucks. Debris from their tires can hit your windshield. Avoid driving on gravel roads when possible. Loose stones can cause chips and cracks.
Regular Maintenance Tips
Inspect your windshield regularly. Look for small chips or scratches. Fix them immediately to prevent spreading. Clean your windshield using a soft cloth. Use a mild glass cleaner. Avoid harsh chemicals. Replace your windshield wipers regularly. Worn-out wipers can scratch the glass. Check for proper alignment. Ensure the windshield is properly installed. Poor installation can lead to cracks.

Credit: www.amazon.com
Frequently Asked Questions
Can You Fix A Cracked Windshield Yourself?
Yes, you can fix small cracks yourself. Use a windshield repair kit from an auto store.
How Much Does Windshield Repair Cost?
Windshield repair typically costs between $20 to $70. Prices vary depending on crack size and location.
What Tools Are Needed For Windshield Repair?
You’ll need a windshield repair kit, which includes resin, curing strips, and an applicator.
How Long Does Windshield Repair Take?
Windshield repair usually takes about 30 minutes. Ensure the resin is fully cured before driving.
Conclusion
Fixing a cracked windshield is easier than you think. Follow the steps carefully. Use the right tools and materials for the job. Safety always comes first. Take your time to ensure a proper repair. If the crack is large, consider seeking professional help.
Regular checks can prevent future damage. A well-maintained windshield keeps you safe on the road. Remember, small cracks can grow quickly. Act fast to avoid costly replacements. Stay safe and drive with a clear view.
As an Amazon Associate, I earn from qualifying purchases


