
Is your Honda Civic’s air feeling stuffy or smelling musty? It might be time to replace your cabin air filter.
You don’t need to be a car expert or spend a lot of money to do it yourself. In fact, changing your cabin air filter is a simple task that can improve the air quality inside your car and keep you breathing fresh.
Keep reading, and you’ll learn exactly how to replace your Honda Civic’s cabin air filter quickly and easily—no hassle, no confusion. By the end, you’ll feel confident doing it on your own and saving time and money.
Signs Of A Dirty Cabin Air Filter
A cabin air filter keeps the air inside your Honda Civic clean. It stops dust, pollen, and other particles from entering. Over time, the filter gets dirty and clogged. This affects the air quality and your car’s ventilation system. Recognizing the signs of a dirty cabin air filter helps you know when to replace it. It keeps your drive fresh and healthy.
Reduced Airflow
One clear sign is weaker airflow from the vents. The fan may run, but less air comes out. Dust and dirt block the filter, slowing air movement. Your car’s interior may feel stuffy or warm. This means the filter no longer works well.
Unpleasant Odors
A dirty cabin air filter can cause bad smells. Dust, mold, and debris trapped inside create odors. These smells appear when you turn on the AC or heater. Fresh air turns stale, making your ride less pleasant.
Increased Allergies
If you or passengers sneeze or cough more, check the filter. A clogged filter lets pollen and dust into the car. This worsens allergy symptoms during drives. Changing the cabin air filter helps reduce these problems.
Credit: www.youtube.com
Tools Needed For Replacement
Replacing the cabin air filter in your Honda Civic is a simple task. Having the right tools makes the job faster and easier. This section lists the tools you need to complete the replacement smoothly.
Basic Tools Checklist
Gather these basic tools before starting:
- Screwdriver (usually Phillips head)
- Socket wrench or ratchet set
- Flashlight or work light
- Gloves to keep hands clean
- Clean cloth to wipe dust
These tools help you open panels and remove the old filter carefully. Having them ready prevents interruptions.
Choosing The Right Filter
Select a cabin air filter that fits your Honda Civic model. Check your car’s manual for the correct size. Use filters made with good quality materials. Look for ones that trap dust, pollen, and odors well.
Buying the right filter ensures cleaner air inside your car. It keeps the cabin fresh and improves air flow.
Locating The Cabin Air Filter
Locating the cabin air filter in a Honda Civic is a simple first step to replacing it. This filter cleans the air inside your car. Knowing its position helps you change it quickly and keep fresh air flowing. The cabin air filter is easy to find with a little guidance.
Position In Honda Civic
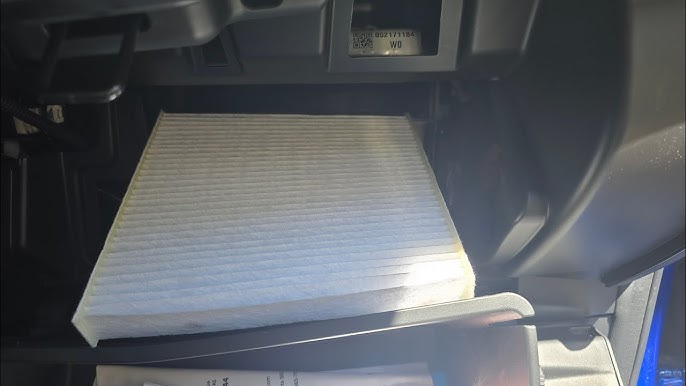
The cabin air filter sits behind the glove box. It is near the passenger side dashboard. This spot keeps the filter out of sight but easy to reach. It filters air before it enters the car’s cabin. Most Honda Civic models place the filter in this exact location.
Accessing The Filter Compartment
To reach the filter, first open the glove box. Then, gently remove the glove box by releasing the stops on the sides. This allows the glove box to hang down or come out completely. Behind it, you will see a rectangular cover. Remove this cover to find the cabin air filter. This cover usually snaps off or is held by small screws. Once removed, you can pull out the old filter and replace it.
Credit: www.serrahondachampaign.com
Step-by-step Replacement Process
Replacing the cabin air filter in your Honda Civic is a simple task. It helps keep the air inside your car fresh and clean. Follow these steps carefully to do the job right. No special tools are needed, just a little patience.
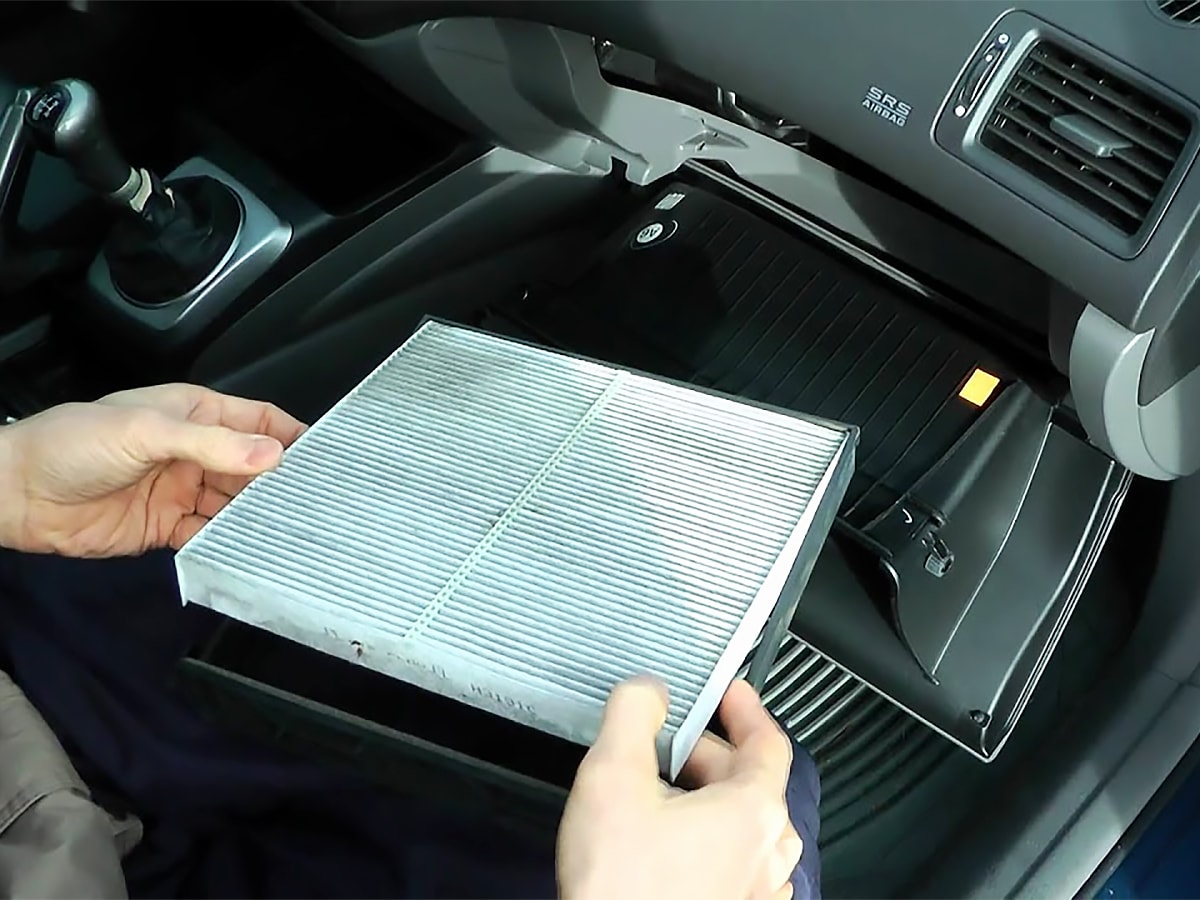
Removing The Old Filter
Open the glove box and empty its contents. Look for the stops on the sides and gently push them in. This lets the glove box drop down fully. Behind it, find the filter cover and unclip it. Pull out the old filter slowly to avoid dust spreading.
Cleaning The Filter Area
Use a soft cloth to wipe the filter slot area. Remove any leaves, dust, or debris. Clean this space well to help the new filter work better. Avoid using water or liquids inside the slot to prevent damage.
Installing The New Filter
Take the new cabin air filter out of its packaging. Check the arrow on the filter; it shows airflow direction. Insert the filter with the arrow pointing inward. Snap the cover back in place. Lift the glove box and push it back until it clicks.
Tips For Maintaining Cabin Air Quality
Maintaining clean air inside your Honda Civic is important. Good air quality helps you breathe easier and stay healthy. Dirt, dust, and pollen can build up inside your car. This makes the air feel stuffy and can cause allergies. Taking care of your cabin air filter is one way to keep the air fresh. There are other simple tips to improve cabin air quality too.
Follow these easy steps to enjoy cleaner air in your car every day.
Regular Filter Checks
Check your cabin air filter often. A dirty filter blocks airflow and traps dust inside. Look at the filter every 12,000 to 15,000 miles or once a year. Replace it if you see dirt or damage. A clean filter helps your car’s air system work well. It keeps dust and allergens out of the cabin. Checking the filter is quick and saves money on repairs.
Additional Air Purification Methods
Use other ways to keep your car air fresh. Open windows for a few minutes to let fresh air in. Use a small air purifier made for cars. These devices remove dust and smells. Avoid smoking inside the car. Clean the dashboard and seats regularly to reduce dust. These simple steps make your car air cleaner and more pleasant.

Credit: www.ifixit.com
Frequently Asked Questions
How Often Should I Replace The Cabin Air Filter In Honda Civic?
Replace the cabin air filter every 12,000 to 15,000 miles or once a year for clean air.
What Tools Do I Need To Replace The Cabin Air Filter?
You usually need no tools or just a screwdriver to open the filter cover.
Where Is The Cabin Air Filter Located In Honda Civic?
The cabin air filter is behind the glove box or under the dashboard.
How Can I Tell If The Cabin Air Filter Needs Replacement?
Look for bad odors, weak airflow, or dirty filter material as signs.
Can I Replace The Cabin Air Filter Myself Easily?
Yes, it is a simple task that most people can do at home.
What Happens If I Don’t Replace The Cabin Air Filter?
Dirty filters reduce air quality and can cause bad smells and poor airflow.
Conclusion
Replacing the cabin air filter in your Honda Civic is simple and quick. A clean filter improves air quality and keeps your car fresh. Regular changes help your car’s ventilation work well. You only need a few tools and little time.
Follow the steps carefully for the best results. Now you can breathe easier during every drive. Keep your Civic comfortable and healthy with this easy task.
As an Amazon Associate, I earn from qualifying purchases