As an Amazon Associate, I earn from qualifying purchases
Removing auto window tint yourself can save you time and money. It’s a task that many car owners can handle with the right tools and guidance.
Tints can degrade over time or simply go out of style. Whether it’s bubbling, fading, or you just want a change, understanding how to DIY remove auto window tint is beneficial. The process isn’t overly complex, but it does require patience and careful attention to detail.
This guide will walk you through the steps, offering tips to ensure a smooth and successful tint removal. By the end, you’ll have clear windows and newfound skills, all without the need for professional help. Let’s dive into the details and get started on this practical and rewarding project.
Gather Necessary Tools
Removing auto window tint yourself can be a rewarding project. Before starting, gather all the necessary tools. Proper tools make the job easier and safer. This section will guide you through the essential tools needed for this task.
Checklist Of Tools
Having the right tools is crucial. Here is a checklist of what you need:
- Razor blade or utility knife
- Spray bottle filled with soapy water
- Hairdryer or heat gun
- Microfiber cloth
- Plastic scraper or credit card
- Glass cleaner
- Paper towels
- Garbage bag
- Rubber gloves
Where To Buy
You can find most of these tools at local hardware stores. Stores like Home Depot and Lowe’s stock these items. Big-box retailers like Walmart also carry them. Online options include Amazon and eBay. Shopping online offers the convenience of home delivery. Compare prices for the best deals. Some items may be cheaper online, while others may be better bought locally.

Credit: www.youtube.com
Prepare The Workspace
Before starting to remove your auto window tint, it’s crucial to prepare your workspace. A well-organized area ensures safety and efficiency. Here’s how to get started:
Choose A Suitable Location
First, find a good spot to work. A garage or driveway is ideal. Avoid working in direct sunlight. This can make the adhesive harder to remove. A shaded area will help. Make sure there’s enough space to move around your vehicle. It’s important to have good lighting too. This helps you see clearly as you work.
Safety Precautions
Safety comes first. Wear gloves to protect your hands. Use safety glasses to shield your eyes. Have a first aid kit nearby. Keep all tools and materials within reach. Ensure children and pets stay away from the workspace. This prevents accidents and distractions. Clear the area of any obstructions. This helps maintain focus and safety.
Clean The Window Surface
Before removing the auto window tint, it is essential to clean the window surface. This step ensures that no dirt or debris interferes with the tint removal process. A clean surface also allows for better visibility and reduces the risk of scratches on the glass.
Remove Dirt And Debris
Start by using a soft cloth or microfiber towel to wipe down the window. This helps to remove any loose dirt and debris. For stubborn spots, use a mild glass cleaner.
- Spray the cleaner onto the window.
- Wipe it with a clean cloth in circular motions.
- Ensure all edges and corners are cleaned thoroughly.
Consider using a soft-bristle brush for hard-to-reach areas. This ensures that all dirt is removed, leaving the surface spotless. Avoid using harsh chemicals or abrasive materials. These can damage the glass and the tint film.
Dry The Window
After cleaning, it is crucial to dry the window completely. Use a dry microfiber towel to blot any excess moisture. Ensure there are no water streaks or droplets left on the surface.
- Blot the surface with the towel.
- Gently wipe in one direction.
- Inspect the window for any remaining moisture.
Leaving the window dry prevents water spots and ensures a smooth tint removal process. A dry surface also minimizes the risk of slipping tools during the removal.
Once the window is clean and dry, you are ready to proceed with the tint removal.
Heat The Tint
Removing auto window tint can seem daunting, but it’s a straightforward task. The process involves several steps, one of which is heating the tint. Proper heating helps you peel off the tint without leaving sticky residue. In this section, we will delve into how to heat the tint effectively and what to look for during the process.
Use A Hairdryer Or Heat Gun
A hairdryer or a heat gun can be used to heat the tint. Both tools work similarly by loosening the adhesive. Follow these steps:
- Plug in your hairdryer or heat gun.
- Set it to a medium heat setting.
- Hold the device about two inches from the tint.
- Move it slowly across the surface to ensure even heating.
The goal is to warm up the tint until it becomes pliable. Avoid overheating as it can damage the window. Heating helps you to peel the tint smoothly.
Check For Bubbling
While heating, watch for bubbling. Bubbling indicates that the adhesive is loosening. Once you see bubbles, you can start peeling the tint.
Follow these steps:
- Find a corner of the tint.
- Carefully lift the corner using a razor blade.
- Slowly pull the tint away from the window.
Continue heating sections as you peel. This ensures the adhesive remains soft. If the tint resists, apply more heat. Consistent heating makes the removal process easier.
By using the right tools and watching for signs, you can remove auto window tint efficiently.
Peel Off The Tint
Removing the window tint yourself can save you money. One crucial step in this process is to peel off the tint. This step requires some patience and technique to avoid damaging the window. Follow these steps to do it correctly:
Start From A Corner
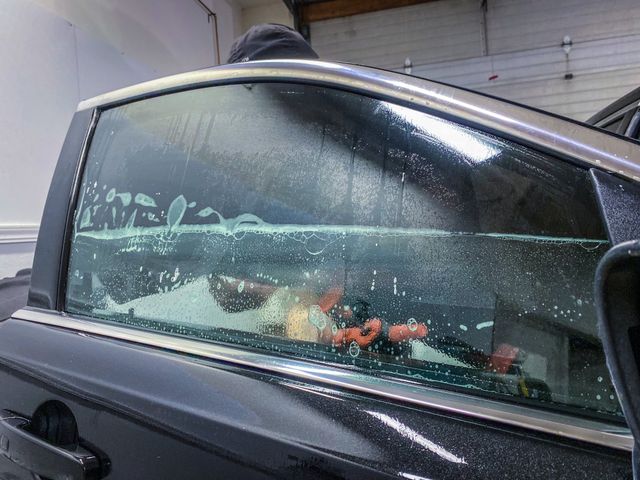
Use a sharp blade to lift the edge of the tint film. You can start at any corner of the window. Be careful not to scratch the glass while doing this.
| Tools | Description |
|---|---|
| Blade or Knife | Helps lift the edge of the tint film |
| Hair Dryer | Heats the film, making it easier to peel off |
Pull Gently
Once you have lifted a corner, start pulling the film slowly. Pull gently to avoid tearing the film. If the tint is old, it may come off in pieces. Use a hair dryer to heat the film as you pull. Heat softens the adhesive, making it easier to remove.
- Warm the tint with a hair dryer
- Pull the film evenly to avoid tearing
- Use a blade to lift any stubborn spots

Credit: www.thedetaildoc.co
Remove Adhesive Residue
After removing the tint film, you often find sticky adhesive residue on your car window. This residue can be stubborn and difficult to clean. It is important to remove it properly to restore your window’s clarity.
Apply Adhesive Remover
Start by applying an adhesive remover. You can find these in auto stores. Spray the adhesive remover generously on the window. Allow it to sit for a few minutes. This helps to break down the sticky residue.
Consider using a plastic scraper to gently lift the softened adhesive. Be careful not to scratch the glass. You can also use a razor blade, but take caution to avoid damaging the window.
| Tools Needed | Purpose |
|---|---|
| Adhesive Remover | Breaks down sticky residue |
| Plastic Scraper | Lift softened adhesive |
| Razor Blade | Carefully remove residue |
Wipe Clean
After applying the adhesive remover, use a clean cloth to wipe away the residue. Use a microfiber cloth for best results. Microfiber cloths are gentle and do not scratch the glass.
For stubborn spots, reapply the adhesive remover and scrape again. Repeat this process until all residue is gone. Finally, clean the window with glass cleaner. This ensures no adhesive remover remains on the window.
- Spray adhesive remover.
- Let it sit for a few minutes.
- Use a plastic scraper or razor blade.
- Wipe with a microfiber cloth.
- Clean with glass cleaner.
Final Cleaning
After successfully removing the window tint, it’s time for the final cleaning. This step ensures your windows look clear and polished. It’s crucial to remove any leftover adhesive and dirt.
Wash The Window
Start by washing the window with soapy water. Use a soft cloth to avoid scratches. Ensure you cover every inch of the window. Rinse with clean water to remove soap residue. Dry the window with a microfiber towel for a spotless finish.
Polish The Surface
Apply a window polish for a sparkling clean finish. Use a soft cloth to spread the polish evenly. Buff the window in circular motions. Ensure no streaks or smudges remain. This step will make your window shine like new.

Credit: www.amazon.com
Inspect The Window
Removing auto window tint can give your car a fresh look. After peeling off the tint, it’s crucial to inspect the window. This step ensures no residue remains, providing a clear view.
Check For Leftover Tint
After removing the window tint, examine the window closely. Look for any leftover pieces of tint or adhesive. Even small bits can affect your view. Use a flashlight to spot any tiny pieces. These often hide in the corners or edges of the window.
- Use a flashlight to check for small pieces.
- Look closely at the corners and edges.
- Feel the window surface for any sticky spots.
Ensure Clarity
Next, ensure the window is clear. Any leftover adhesive can blur your view. Use a window cleaner and a microfiber cloth to clean the glass. Wipe in circular motions for the best results. This will help remove any residue left behind.
| Tools Needed | Purpose |
|---|---|
| Window Cleaner | Removes adhesive residue |
| Microfiber Cloth | Provides a streak-free finish |
Repeat the cleaning process if necessary. The goal is to have a completely clear window. This improves visibility and safety when driving.
Frequently Asked Questions
What Tools Do I Need To Remove Window Tint?
You need a razor blade, a heat gun, an adhesive remover, and a microfiber cloth to remove window tint.
Can I Remove Window Tint With Just Soap And Water?
Soap and water can help, but it’s not enough. You’ll also need a razor blade and heat.
How Long Does It Take To Remove Window Tint?
Removing window tint can take 1 to 2 hours, depending on the size and condition of the tint.
Will Removing Window Tint Damage My Car Windows?
If done correctly, removing window tint won’t damage your car windows. Be gentle and use proper tools.
Conclusion
Removing auto window tint at home is simple and cost-effective. Follow our steps for a smooth process. Gather the needed tools and materials first. Work in small sections for better control. Use steam or ammonia to loosen the adhesive. Peel off the tint carefully to avoid damage.
Clean your windows thoroughly after removing the tint. Enjoy your clear windows and enhanced driving experience. With patience and care, anyone can do this. Save money and learn a handy skill. Happy tint removal!
As an Amazon Associate, I earn from qualifying purchases


