
If you want your Honda Civic to run smoothly and save on fuel, changing the air filter is one simple step you can take. A clean air filter lets your engine breathe better, improving performance and protecting your car from dirt and dust.
You don’t need to be a mechanic to do it yourself. In this guide, you’ll learn exactly how to change your Honda Civic’s air filter quickly and easily. Keep reading—you’ll be surprised how simple this maintenance task can be, and how much it helps your car in the long run.
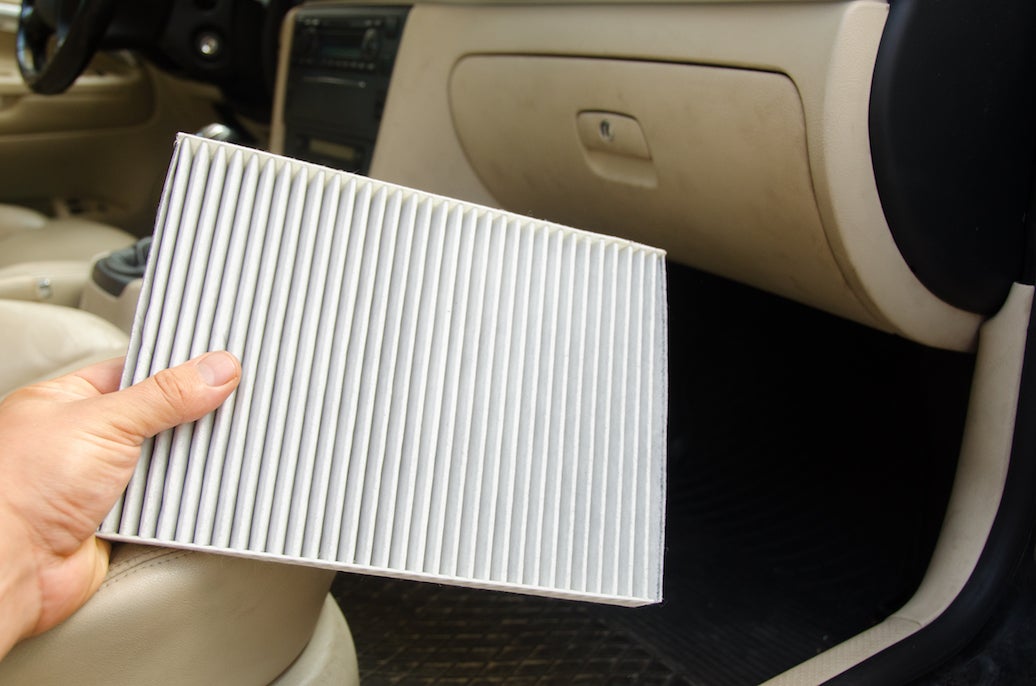
Credit: www.gunnhonda.com
Tools Needed
Changing the air filter on your Honda Civic is a simple task. Having the right tools makes the job easier and faster. You do not need many tools to complete this maintenance step.
Socket Wrench Set
A socket wrench set helps remove screws and bolts. It fits different sizes, making it useful for various parts.
Flathead Screwdriver
A flathead screwdriver is handy for prying open clips or covers. It gives you better control when loosening parts.
New Air Filter
Buy the correct air filter for your Honda Civic model. Using the right filter ensures better engine performance.
Clean Cloth
A clean cloth helps wipe dust and dirt from the air filter box. Keeping the area clean prevents debris from entering the engine.
Gloves (optional)
Gloves protect your hands from dirt and sharp edges. They make the task more comfortable but are not mandatory.
Locate The Air Filter Box
Locating the air filter box in your Honda Civic is the first step to changing the air filter. The air filter box holds the filter that cleans the air entering the engine. Finding it quickly saves time and makes the job easier.
The air filter box is usually easy to spot under the hood. It is a black plastic box near the engine. Knowing its location helps you replace the air filter safely and correctly.
Open The Hood Of Your Honda Civic
Start by pulling the hood release lever inside your car. It is usually found near the driver’s side footwell. Lift the hood and secure it with the prop rod. Make sure the engine is cool before touching anything.
Identify The Air Filter Box
Look for a rectangular or square black plastic box. It is often on the left or right side of the engine bay. The box has clips or screws holding the cover in place. This box contains the air filter you need to change.
Check For Air Intake Hose
Find a large hose connected to the air filter box. This hose carries air from outside to the engine. The hose helps confirm you have found the right box. Tracing this hose leads you straight to the air filter box.
Open The Air Filter Housing
Opening the air filter housing is the first step to changing your Honda Civic’s air filter. This part keeps dust and dirt from entering the engine. Accessing it is simple and requires no special tools.
Knowing how to open the air filter housing helps you maintain your car’s performance. Clean air filters improve fuel efficiency and engine life. Follow these steps to open the housing safely and easily.
Locate The Air Filter Housing
Find the air filter housing under the hood, near the engine. It is usually a black plastic box with clips or screws. Checking your owner’s manual can help identify the exact spot.
Remove The Clips Or Screws
Unfasten the clips or screws holding the housing cover. Use a screwdriver if screws are present. Keep the clips or screws in a safe place for reassembly.
Lift The Housing Cover Carefully
Gently lift the cover to avoid damaging it. Sometimes, the cover is connected by a hose. Move the cover enough to access the air filter inside.

Credit: www.ifixit.com
Remove The Old Air Filter
Removing the old air filter from your Honda Civic is a simple but important step. It helps keep the engine clean and running smoothly. This part prevents dirt and debris from entering the engine.
Over time, the air filter gets clogged with dust and particles. This lowers your car’s performance and fuel efficiency. Changing the filter regularly improves airflow and engine health.
Open the hood of your Honda Civic. Look for a black plastic box near the engine. This is the air filter box. It usually has clips or screws holding the lid in place.
Open The Air Filter Box
Release the clips or unscrew the fasteners on the air filter box. Lift the lid carefully. Avoid forcing it open to prevent damage. Set the lid aside safely.
Take Out The Old Air Filter
Lift the old air filter straight up and out of the box. Notice how it fits inside the box. The filter may be dirty or dusty. Dispose of it properly after removal.
Clean The Air Filter Compartment
Cleaning the air filter compartment is a key step in changing your Honda Civic’s air filter. Dirt and debris can build up inside the compartment. This buildup can reduce air flow and affect engine performance.
Removing all dust and grime helps the new air filter work better. It also keeps your engine cleaner for longer.
Remove Loose Dirt And Debris
Use a soft brush or a dry cloth to clear out loose dirt. Gently sweep the compartment to avoid pushing dirt deeper. This step prevents debris from entering the engine.
Vacuum The Compartment
Use a handheld vacuum to clean hard-to-reach corners. This removes fine dust particles that brushing might miss. Make sure the compartment is completely clean before installing the new filter.
Wipe The Edges And Seals
Use a damp cloth to wipe around the edges and seals. Dirt here can stop the filter from sealing properly. A good seal ensures no unfiltered air enters the engine.

Credit: www.youtube.com
Install The New Air Filter
Installing the new air filter in your Honda Civic is a simple step that improves engine performance. A clean air filter helps the engine breathe better and saves fuel. Follow these clear instructions to fit the new filter correctly.
Position The New Air Filter Properly
Take the new air filter out of its packaging. Look at its shape and size. Match it with the air filter box opening. Place the filter flat inside the box. Make sure it fits snugly with no gaps.
Secure The Air Filter Cover
Lower the air filter cover back onto the box. Align it carefully so it sits evenly. Press down firmly to seal the filter inside. Check that the clips or screws are ready to lock the cover.
Lock The Air Filter Box
Fasten the clips or tighten the screws to close the box. Do not overtighten to avoid damage. Ensure the cover is sealed tightly to keep dirt out. A secure box keeps the filter in place while driving.
Close The Air Filter Housing
Closing the air filter housing is the final step after replacing your Honda Civic’s air filter. This part keeps the air filter in place and stops dirt from entering the engine. A secure housing ensures your engine breathes clean air and runs smoothly.
Take your time to close it properly. A loose or misaligned cover can cause air leaks. This reduces engine performance and may let debris inside. Make sure the housing fits snugly and locks securely.
Align The Air Filter Housing Cover
Place the cover back over the air filter. Match the edges carefully with the base. Check that the filter stays flat and does not move.
Secure The Clips Or Screws
Fasten the clips or screws holding the housing. Tighten them by hand or with a screwdriver. Avoid over-tightening to prevent damage.
Double-check The Seal
Run your fingers along the edges. Feel for gaps or loose spots. Adjust the cover until it seals completely.
Test The Fit
Gently press the housing cover. It should not shift or wiggle. A tight fit keeps the air filter safe and effective.
Check For Proper Installation
Checking for proper installation is important after changing your Honda Civic’s air filter. A correctly installed air filter keeps dirt out and helps your engine run smoothly. It also improves fuel efficiency and engine life. Missing this step can cause engine problems and reduce car performance.
Take your time to inspect the filter and its placement. Make sure it fits snugly in the air filter box. Even small gaps can let dirt inside. Proper installation ensures your Civic runs clean and strong.
Inspect The Air Filter Seal
Look at the edges of the air filter. Check if the seal is flat and even. The seal should touch the edges of the air filter box without gaps. This stops air from bypassing the filter and entering the engine.
Confirm The Filter Orientation
Ensure the filter is facing the correct way. Most filters have arrows showing airflow direction. Match these arrows with those on the air filter box. Wrong orientation lowers air cleaning and harms engine performance.
Secure The Air Filter Box Cover
Close the air filter box cover tightly. Listen for clicks or locks to confirm it is sealed. A loose cover lets unfiltered air reach the engine. Double-check all clips, screws, or latches are fastened properly.
Maintenance Tips
Maintaining your Honda Civic’s air filter is important for smooth engine performance. Regular care keeps the engine clean and saves fuel. This section shares simple tips to help you maintain the air filter effectively.
When To Replace
Check your air filter every 12,000 to 15,000 miles. Replace it sooner if you drive in dusty or heavy traffic areas. A fresh filter keeps air flowing well to the engine.
Signs Of A Dirty Filter
Notice slower acceleration or rough idling. The engine may sound louder or use more fuel. These signs often mean the air filter is clogged and needs change.
Benefits Of Regular Changes
Changing the air filter regularly improves fuel efficiency. It reduces engine wear and extends its life. Clean air filters help your Honda Civic run smoothly and save money on repairs.
Frequently Asked Questions
How Often Should I Change My Honda Civic’s Air Filter?
Change the air filter every 12,000 to 15,000 miles or once a year for best performance.
What Tools Do I Need To Change The Air Filter?
Usually, just a screwdriver or sometimes no tools are needed for Honda Civic air filters.
How Do I Know If My Air Filter Needs Changing?
Look for dirt, dust, or a dark color on the filter as signs to replace it.
Can A Dirty Air Filter Affect My Car’s Fuel Economy?
Yes, a clogged air filter reduces airflow and can lower your Honda Civic’s fuel efficiency.
Is It Difficult To Change The Air Filter Myself?
No, changing the air filter is simple and can be done in a few minutes.
Where Is The Air Filter Located In A Honda Civic?
The air filter is inside the black box near the engine, usually on the top left side.
Conclusion
Changing your Honda Civic’s air filter keeps your engine clean and running well. It takes only a few minutes and needs simple tools. A clean air filter helps save fuel and improves air flow. Check your filter every 12,000 miles or once a year.
Doing this small task can prevent bigger car problems later. Keep your Civic healthy by staying on top of air filter care. Easy to do, good for your car’s life. Give your engine the fresh air it needs.
As an Amazon Associate, I earn from qualifying purchases